DIY Floral Arrangement with Everbloom Designs | KP FUSION
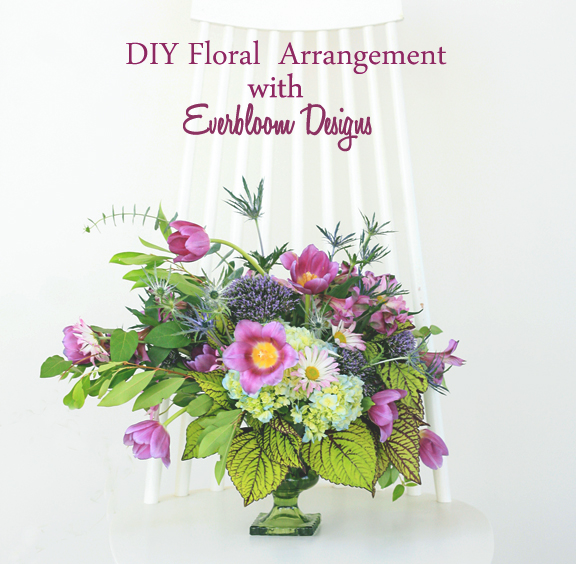
There’s nothing quite like the way pretty blooms quickly brighten up a home, but for a lot of people, you want to do more than just grab a pre-made bouquet from the store. You want it to have some oomph! I reached out to floral designer + stylist Kristin Wolter-Canfield of Everbloom Designs for a DIY Floral Arrangement tutorial; you can use these tips for both simple arrangements and more advanced design! What you’ll need: vase (select based on the size that you want your arrangement to be) pruners (used for branches/wood stems) floral shears (used to clip stems. it’s better to use shears designed for flowers to make sure the ends remain open to absorb water) waterproof floral tape (use this to make a grid so that stems stay in place) blooms, fill, + greenery (for this arrangement we used purple trachelium, hydrangea, tulips, alstroemeria, thistle, spiral eucalyptus, and daisies. She foraged honeysuckle, branches, and coleus from her neighborhood). A tip from Kristin on your flowers: Make sure you are getting the freshest flowers (it’s ok to ask when they arrived). Take a look at the stems to see if they look fresh: there should be no broken stems or mold, and blooms should be tight. If buying roses, the bud heads should not be soft. If making arrangements for an event, choose flowers from the grocery store a few days prior. This way they will have a few days to open up. Choose blooms that compliment your event or your home. Stick to a simple color palette of all the same tones. You will need 3-4 varieties of blooms: a focal flower and a few other smaller flowers that act as filler. Look for interesting textures. Choose a few types of greenery. I almost always forage my greenery from my yard. This gives your arrangements a unique, organic, non store bought look! Prep flowers. Give them a fresh cut and remove all leaves from the bottom of the stems. Prep your container. Create a simple grid pattern to hold your stems in place (you can also use floral foam, floral frog, or chicken wire). Set the shape. Use foliage to create the shape of your arrangement. Asymmetry will give your arrangement a more organic and unique look. Keep turning the arrangement in order to fill it all the way around. Add smaller filler flowers. Keep in mind depth; two “layers” should never be at the same height or position because they won’t be seen. You want to create a lush full arrangement. Give each bloom some room to shine. You don’t have to use every stem-you can build a smaller arrangement with the leftovers. Add your larger focal flowers. In design, odd numbers are best (threes and fives). Place the blooms towards the bottom and turn the arrangement to place them throughout. Voila! Remember: Change the water everyday. Some blooms last longer than others, so onnce blooms expire ,you can take out the ones that still look good, give them a fresh cut, rinse the stems and rearrange them in a new container to enjoy your flowers longer. Visit www.everbloomdesign.com to see more of Kristin’s work. And stay tuned: Kristin held a design workshop as well. I stayed to document and I can’t wait to show you what they created! How often do you have fresh flowers in your home? Hellessy SS15 RTW Beauty Buy | Freeman Charcoal + Black Sugar Facial Polishing Mask